Regular trips to the nail salon don't come cheap. Sure, they usually do a great job and you leave with a fresh and fabulous mani, but those pampering sessions can really nail you in the wallet. But how could you possibly get that professional look without, well, the professional? That's where your inner nail technician rears her pretty head and puts her fingers to work, for her fingers. Yes, you can actually do your very own manicures and they will, (promise), look great. In fact, you'll give 'em a 10! Here are 8 DIY mani inspirations you will love. Get those fingers ready to shine!
1. French Twist

French manicures can be done solo. They just take an extra prop in order to get your lines neat and nifty. Paint your nails in whatever color you choose. Beigey/pink with white tips is the standard, but feel free to get funky. Once your nails are completely (stress: completely) dry, take small bits of masking tape and stick across each nail leaving as much space at the tip as you like for the tip color. Once your tape is on, swipe the other color over the tip; it doesn't matter how neat you are and if you get any polish on the tape – that's coming off. Once that is complete, let it dry before removing the tape to avoid any smudging. Add a clear top coat for sheen and voilà! French mani perfection.
2. Cherry Pop

If you're up for something sweet and playful on your fingernails, try this cherry design. It's flirty, fresh, and fruity! Here's how to do it. Paint your entire nail in either a matte light pink or white. Allow the polish to dry completely. Once that's dry, stick reinforcement stickers on each nail. You know, those white, round tabs you used in middle school so the holes in your paper didn't rip from the binder rings. Once they are applied, paint the middle of the hole in a bright red shade. Once dry, remove the stickers. With a fine brush, add a "stem" using green polish at the top of each "cherry." This look is as easy as (cherry) pie to do yourself!
3. Stars and Stripes
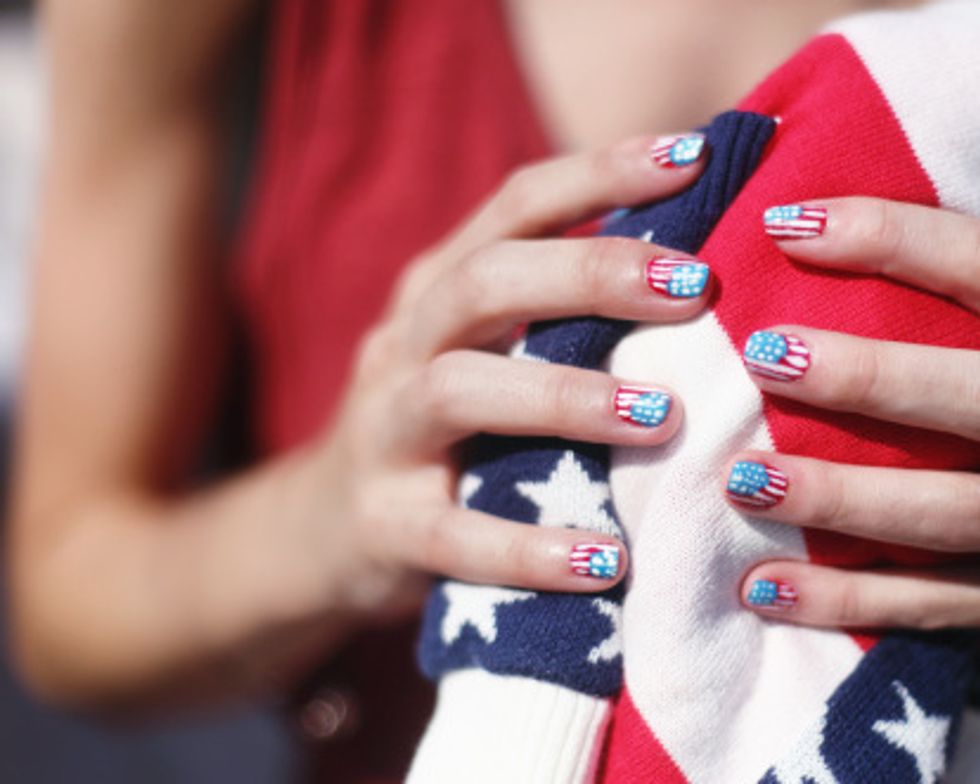
Who says polish can't be patriotic? Go for an all-American mani to celebrate the great U.S.A. First, polish the entire nail with a bright red matte polish. Allow to dry and then follow the steps in mani idea #1, by using masking tape to create a French mani look. Paint the tips in a stark white and allow to dry 100% before removing the tape. Next, find a sparky blue glitter polish and paint ½ of the tip in blue, or you can add the blue just to one finger on each hand – usually the ring finger is the digit of choice. With this look, you'll be proud to wave your hands like they were American flags.
4. Fab Fabrics
A little nail glue can give your nails a look like none other. Polish and print will create a cool combo that's surprisingly simple to do solo. Here's one idea, but once you get the swing of it, you'll be creating looks all your own. Paint your nail in a neutral shade and allow to dry completely. Cut some small squares, just slightly larger than your fingernails from some old fabric you no longer need or buy a bit from a craft store. The thinner the material, the better, something like crinoline works wonders. Coat each nail with some glue and cover with the fabric. Go straight across or on the diagonal, it's your choice. Press firmly to ensure the fabric sticks completely. Once dried, use a nail scissor to remove the extra fabric. Your nails will be "dressed" to impress.
5. Rhinestone Cowgirl
Get your shimmer on with an easy rhinestone mani. To make the look super-glitzy, use a polish that's glitter-based or sparkly. Coat each nail with your favorite shimmery polish. Once that is all dry, make a few small dots on each nail with nail glue in a pattern of your choice. You can also focus the look on just one nail for subtle sophistication. Apply a tiny rhinestone over each dot of glue with a pair of tweezers for precision. Allow to dry and coat the nail in a clear top coat. Get ready to look like a star with nails that glisten and sparkle!
6. Half-Moon Mani
Turn your manicure into a moonicure with a half-moon look featuring the often overlooked bottom portion of the nail down by the nail bed. Again, those trusty reinforcement stickers will aid you in getting this design down pat. First, color your nail in any shade of polish you love. Wait till it's totally dry, then place the reinforcement at the bottom of the nail so that half of it is on the top of the finger just below the nail creating a half moon. Paint the exposed part of the nail in another shade, covering the underlying polish. Once it's all dry, remove the reinforcement to see that half-moon pop of color beneath. This look is super-modern and perfect for an evening look, lit by the moonlight.
7. Rainbow Bright

Show your true colors with a different shade of polish on each nail. Go for the colors of the rainbow or choose colors that reflect your current mood. Think pastels for warm weather and richer tones for the colder months. If you're the experimental kind, try bright neons or sparkly shades. Your manicure will be as fun-loving as you are and it's a great way to use up those last drops of your old polish bottles.
8. Ooh-la-la Ombre
Ombre was all the rage in hair color for a while, so why not test the trend on your fingertips. You will need 5 different colors of polish all in the same color family, ranging from dark to light. Paint each nail in a different color, starting at the thumb with the darkest, and go down the line from boldest to palest. This is a subtle yet modern look that can be achieved in nearly any palate. Ombre for nails will never go out of style. And if it does, you can paint over all the lightest colors with the darkest and presto… a brand new look!
Ready for your perfect 10? Grab a nice polish and let the DIY mani madness begin!